





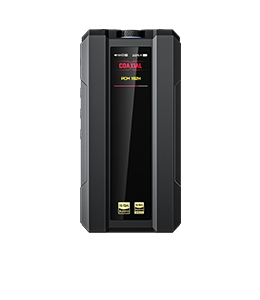
























3. RR13 accessories and button instructions
RR13 accessories:
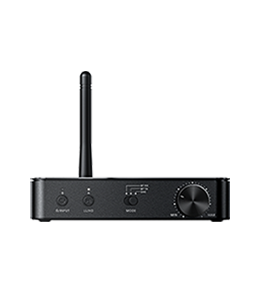
RR13*1, USB-A to Type-C charging cable*1, external telescopic antenna*1, quick start guide*1, warranty card*1
RR13 button instructions:
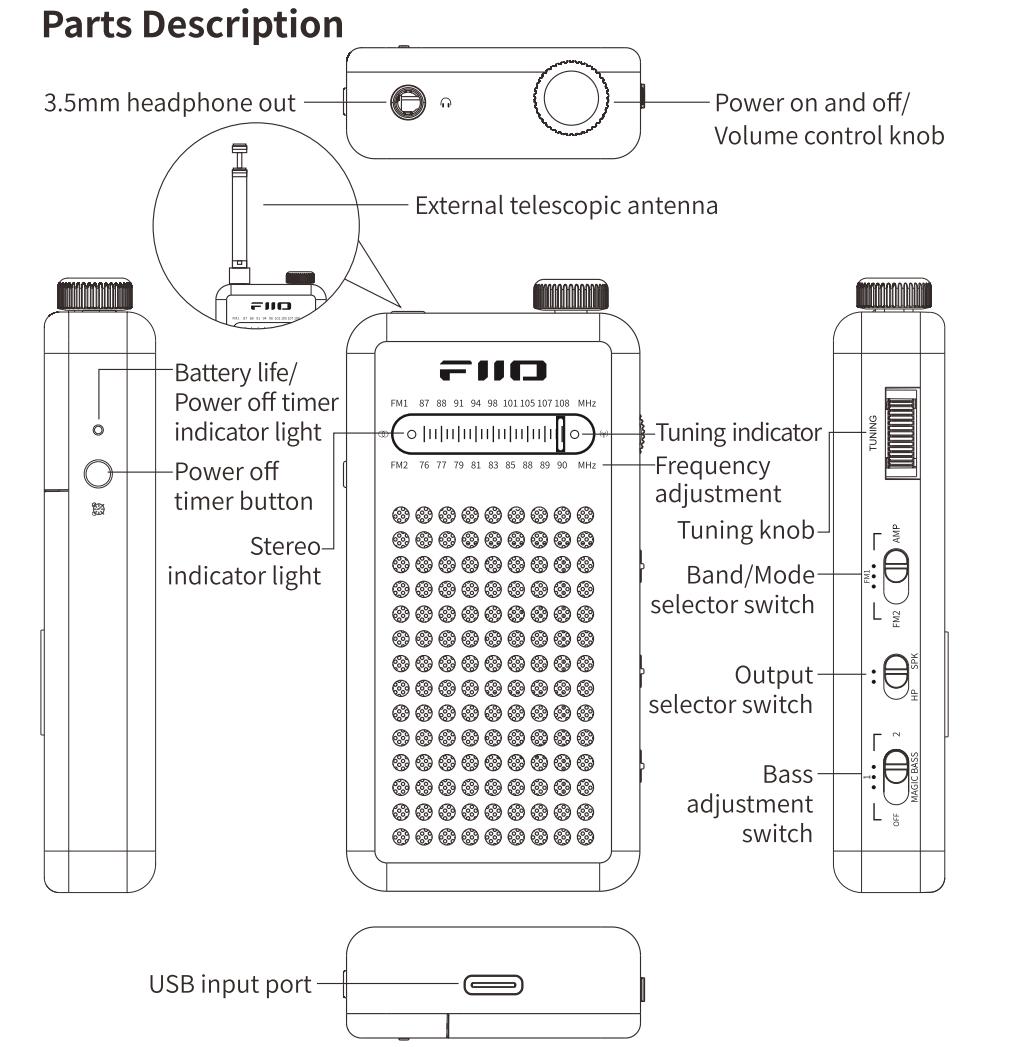
[Power on/off knob]
Long press the top knob for 3 seconds to power on/off.
[Volume control knob]
Rotate the top knob to adjust the volume. Rotate clockwise to increase the volume, and counterclockwise to decrease the volume.
[Band/Mode selector switch]
Slide the upper 3-position toggle on the right side to switch between FM1/FM2/AMP
[Output selector switch]
Slide the middle 2-position toggle on the right side to switch between HP (headphone out)/SPK (speaker out)
[BASS adjustment switch (MAGIC BASS)]
Slide the lower 3-position toggle on the right side to switch between BASS OFF/BASS 1/BASS 2
BASS OFF: Sound effect disabled
BASS 1: BASS (bass enhancement) effect
BASS 2: BASS + 3D surround sound effect
[Tuning knob]
Rotate the knob upward to decrease the frequency; rotate the knob downward to increase the frequency.
[Power off timer button]
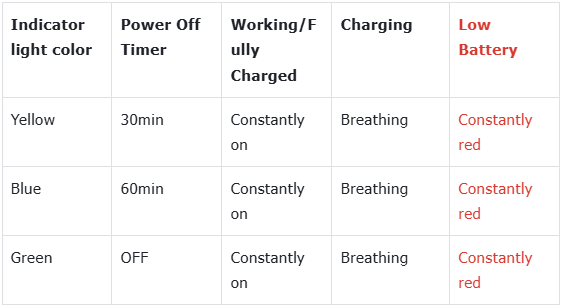
Short press the button on the left to switch between OFF/30min/60min; long press to exit the power off timer.
The corresponding indicator light colors are:
OFF: Green
30min: Yellow
60min: Blue
[External telescopic antenna]
Slide the output mode toggle to the SPK position to enter speaker mode. When using the device on a desktop, insert the external telescopic antenna into the 3.5mm headphone port to improve radio signal reception.
[3.5mm headphone out]
In HP (headphone out) mode: Connect 3.5mm headphones for audio output.
In SPK (speaker out) mode: Connect the external telescopic antenna to enhance radio signal reception.
[USB input port]
Used to connect a 5V–2A USB power cable for power supply.
In AMP mode, it can be used to connect an audio adapter, allowing the RR13 to function as a portable headphone amplifier.
[Battery life/power off timer indicator light]
Indicator light instructions
[Tuning indicator light]
Indicator light off: No radio signal is received at this frequency.
Indicator light dimly lit: Radio signal is weak.
Indicator brightly lit: Radio signal is strong.
Note: If the FM signal is poor, try adjusting the direction of the headphones or moving to an open area.
[Stereo indicator light]
When entering FM mode, the stereo indicator light remains off. Once a stereo broadcast is detected, the stereo indicator light will stay on; the strength of the stereo signal is indicated by the brightness of the stereo indicator light.
